Build a Real-Time Webcam App in Python With Flask, OpenCV, MediaPipe, and ONNX
Building a real-time webcam application is one of the most interesting ways to learn computer vision with Python. Instead of working only with static images, you can capture live video, process each frame, detect faces, apply visual effects, and display the results directly in a web browser.
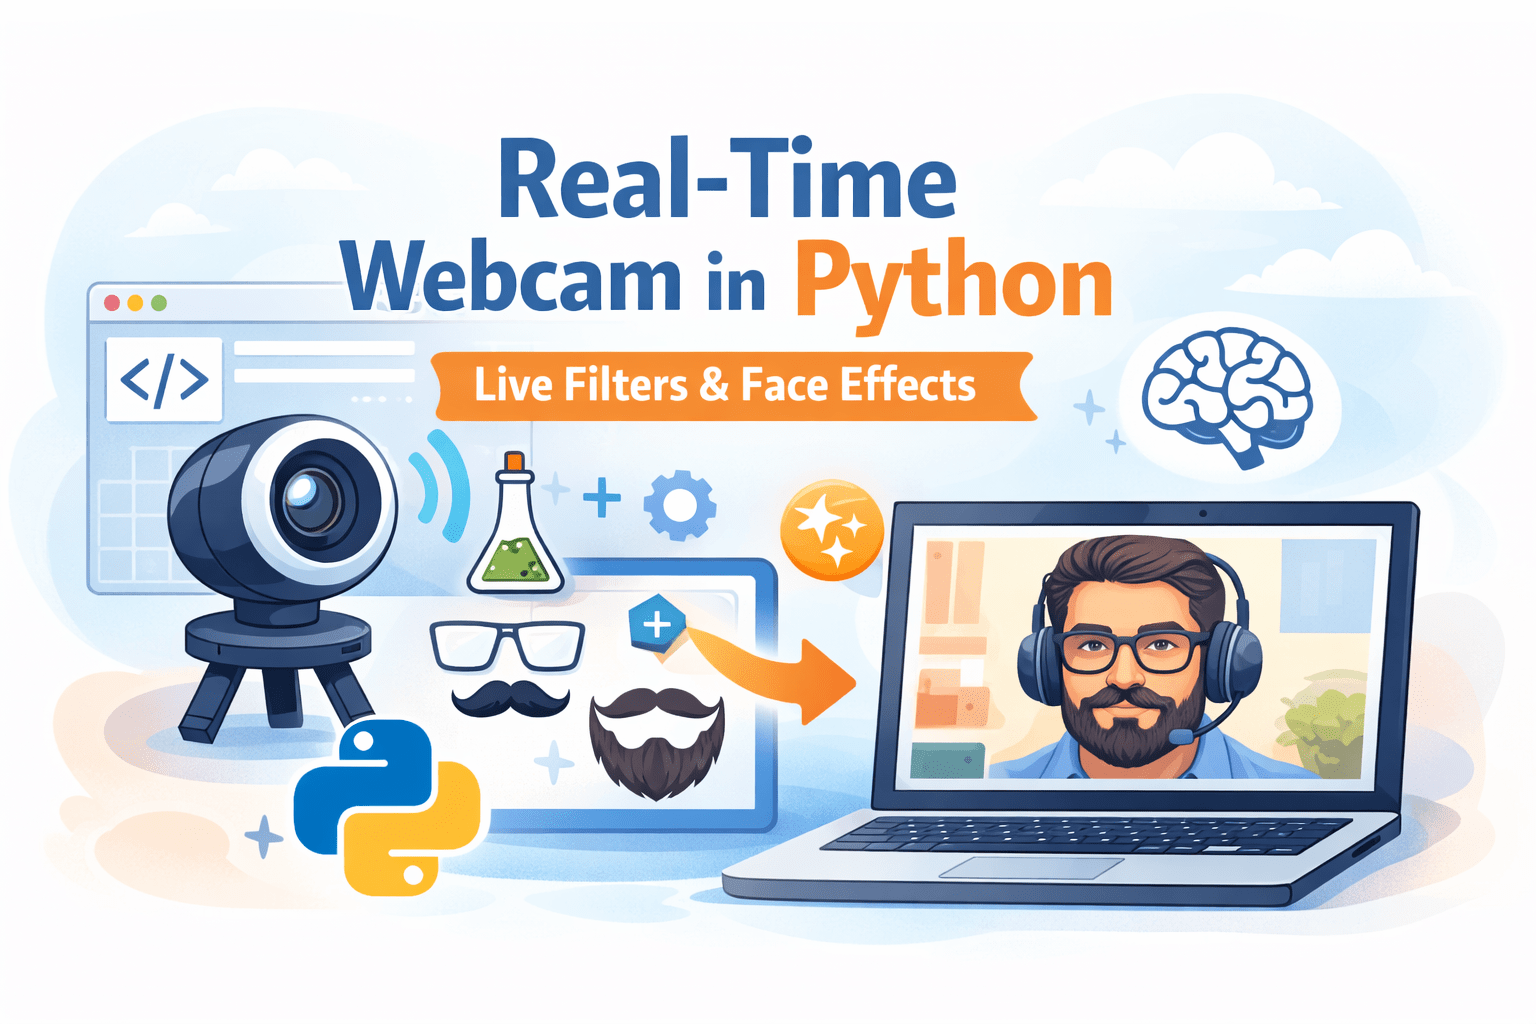
For example, imagine opening a local web application and seeing your webcam feed appear on the page. As you move your head, virtual glasses follow your eyes. A mustache stays near your upper lip, while a beard moves with the lower part of your face.
You could also add simple effects such as grayscale, blur, or edge detection.
Once you understand the basic workflow, you can take the project even further. For instance, you can use MediaPipe for facial landmarks or run compatible AI models with ONNX Runtime for tasks such as face detection and object detection.
In this detailed tutorial, you will learn how to build a real-time webcam app in Python using Flask and OpenCV. We will also explore how MediaPipe can help position face effects and where ONNX Runtime can fit into a more advanced computer vision pipeline.
The project combines several useful technologies:
Python for the main application logic
Flask for the web application and video streaming
OpenCV for webcam capture and image processing
MediaPipe for tracking facial landmarks
ONNX Runtime for running compatible machine learning models
HTML for displaying the live video stream in a browser
By the end, you should understand the complete pipeline behind a simple browser-based webcam filter application.
More importantly, you will have a foundation that you can expand into your own computer vision projects.
What Are We Building?
Our goal is to create a Python application that captures video from a webcam and displays the processed video inside a browser.
The basic workflow looks like this:
Webcam → OpenCV → Frame Processing → Face Tracking → Visual Effects → JPEG Encoding → Flask → Browser
First, OpenCV connects to the webcam and captures video frames.
Next, Python processes each frame. Depending on the features you add, the application can change the colors, blur the image, detect edges, find a face, or track facial landmarks.
After processing, OpenCV converts each frame into a JPEG image.
Flask then sends those JPEG frames to the browser as a continuous stream.
As a result, the user sees something that looks like live video.
For face effects, we can use MediaPipe Face Mesh or another suitable face-landmark solution. Facial landmarks give us reference points around important areas such as the eyes, nose, mouth, and chin.
We can then use those points to position transparent PNG images.
For example:
Eye landmarks can help position glasses.
Mouth and nose landmarks can help position a mustache.
Lower-face landmarks can help estimate where a beard should appear.
This approach creates a basic augmented-reality-style effect.
However, it is important to understand that this tutorial demonstrates the foundation of such a system. A production-quality AR filter requires more work, including rotation, scaling, smoothing, better landmark geometry, and careful handling of different face angles.
Still, this project gives you an excellent place to start.
Part 1: Understanding the Technology Behind the Webcam App
Before writing code, you should understand what each part of the technology stack does.
Although we are combining several tools, each one has a clear job.
Python: The Main Programming Language
Python is widely used for computer vision and machine learning projects because it has a large ecosystem of useful libraries.
In this project, Python connects all the components.
It controls the webcam, processes frames, runs face tracking, applies image effects, and sends the final output through Flask.
If you already know basic Python concepts such as functions, loops, variables, and imports, you should be able to follow the project.
You do not need advanced machine learning knowledge to build the first version.
In fact, we can create several useful effects with OpenCV alone.
Later, we can add MediaPipe and ONNX Runtime when we need more advanced computer vision features.
Flask: Sending Webcam Video to the Browser
Flask is a lightweight Python web framework.
Normally, you might use Flask to create web pages, APIs, dashboards, or small web applications.
In this project, Flask has another job.
It acts as the bridge between our Python video-processing code and the browser.
OpenCV captures and processes webcam frames inside Python. However, a browser cannot automatically display an OpenCV VideoCapture object.
Therefore, we need to convert the processed frames into a format that the browser can receive.
One simple method is an MJPEG-style stream.
The application repeatedly:
Captures a frame.
Processes the frame.
Converts it to JPEG.
Sends the JPEG data through an HTTP response.
Repeats the process.
The browser displays the incoming frames through an <img> element.
This approach is relatively simple, which makes it useful for tutorials and prototypes.
However, it is not the same as a modern low-latency video communication system.
For advanced video chat or highly interactive real-time applications, technologies such as WebRTC may be more appropriate.
For our learning project, Flask streaming provides a straightforward way to understand the complete pipeline.
OpenCV: Capturing and Processing Video
OpenCV is one of the most widely used libraries for computer vision.
For this project, OpenCV handles several important tasks.
First, it connects to the webcam.
A basic webcam connection looks like this:
camera = cv2.VideoCapture(0)
The value 0 usually refers to the default camera.
If your computer has multiple cameras, you may need to try another device index.
Once the camera is open, OpenCV can continuously read frames:
success, frame = camera.read()
If the capture succeeds, frame contains the current webcam image.
From there, OpenCV can modify the frame.
For example, you can:
Convert the frame to grayscale
Blur the image
Detect edges
Resize the frame
Flip the image
Draw shapes
Add text
Blend transparent overlays
Prepare images for machine learning models
Because OpenCV handles both video capture and image processing, it becomes the foundation of our webcam application.
MediaPipe: Tracking Facial Landmarks
Adding glasses or a mustache to a fixed location on the screen is easy.
Making the effect follow a moving face is much harder.
To solve this problem, we need information about the location and shape of the face.
This is where facial landmarks become useful.
A face-landmark system identifies key points on or around facial features.
Depending on the solution you use, these points may represent areas around the:
Eyes
Eyebrows
Nose
Lips
Face outline
Chin
Once we know where these areas appear in each frame, we can calculate where to place our visual effects.
Suppose we want to add virtual glasses.
Instead of placing the glasses at a fixed position, we can use landmarks near the left and right eyes.
The distance between those landmarks gives us an approximate width.
Their position tells us where the glasses should appear.
As the face moves, the landmark positions change.
Therefore, the overlay can move with the face.
This creates a much more convincing effect than using a simple fixed rectangle.
Why Face Landmarks Are Better for Overlays
A basic face detector normally gives you a bounding box.
For example:
x = 200
y = 100
width = 300
height = 300
This tells you where the face is located.
However, it does not precisely tell you where the eyes, nose, or mouth are.
For virtual accessories, those details matter.
Glasses should align with the eyes.
A mustache should sit between the nose and upper lip.
A beard should follow the lower face.
Therefore, facial landmarks are often more useful than a basic face bounding box when building face filters.
ONNX: A Portable Format for Machine Learning Models
ONNX stands for Open Neural Network Exchange.
In simple terms, ONNX provides a standard format for representing compatible machine learning models.
A developer might train a model in one machine learning framework and then export it to ONNX for deployment in another environment.
This can make deployment more flexible.
However, ONNX itself does not perform the inference.
You still need a runtime that can load and execute the model.
That is where ONNX Runtime comes in.
What Is ONNX Runtime?
ONNX Runtime is an inference engine that can run supported ONNX models.
In our webcam project, ONNX Runtime could be useful if you want to add a compatible AI model for tasks such as:
Face detection
Object detection
Image segmentation
Classification
Other supported computer vision tasks
The general workflow looks like this:
Webcam Frame → Image Preparation → ONNX Model → Prediction → Visual Result
For example, suppose you have an ONNX face-detection model.
OpenCV captures a webcam frame.
Next, your code resizes and prepares the image according to the model’s input requirements.
ONNX Runtime runs inference.
The model then returns predictions.
Finally, your application interprets those predictions and draws the results on the frame.
This can happen repeatedly as new webcam frames arrive.
Do You Need ONNX Runtime for This Project?
Not necessarily.
This is an important point.
If your main goal is to build simple glasses, beard, and mustache effects, MediaPipe facial landmarks may already provide what you need.
Adding ONNX Runtime simply because it sounds more advanced can make the project unnecessarily complicated.
Instead, use ONNX Runtime when you have a specific ONNX model that solves a problem in your application.
For example, you might use:
MediaPipe for facial landmarks
OpenCV for video and image processing
ONNX Runtime for a separate object-detection model
This creates a modular system where each tool has a specific purpose.
Choosing the Best Libraries for a Real-Time Webcam App
Several Python libraries can help with real-time computer vision.
However, they are not interchangeable.
Let’s look at the main options and when you might use each one.
1. OpenCV: The Core Computer Vision Library
For this project, OpenCV is one of the most important libraries.
It handles:
Webcam capture
Frame resizing
Color conversion
Image filters
JPEG encoding
Drawing
Image overlays
You can build a basic webcam filter application using only Flask and OpenCV.
For example, you could easily create:
Grayscale webcam
Blurred webcam
Edge-detection camera
Cartoon-style experiments
Color filters
However, accurate face effects usually require additional face tracking.
That is where a landmark solution becomes useful.
2. MediaPipe: Useful for Face-Based Effects
MediaPipe is well suited to many real-time perception tasks.
For a face-filter project, facial landmarks can help track important areas of the face.
This makes it useful for effects such as:
Virtual glasses
Mustaches
Beards
Face masks
Hats
Simple AR-style effects
However, simply detecting landmarks does not automatically create a perfect filter.
You still need to calculate:
Position
Width
Height
Rotation
Scale
You may also need smoothing to prevent the overlay from shaking when landmark positions change slightly between frames.
Therefore, MediaPipe provides useful tracking data, while your application controls how the final effect looks.
3. ONNX Runtime: Useful for Deploying Compatible AI Models
ONNX Runtime becomes useful when your application needs to run an ONNX model.
For example, you might have an optimized model for detecting specific objects.
Instead of running the original training framework inside your application, you can potentially export a compatible model to ONNX and run inference with ONNX Runtime.
This can make deployment more practical.
However, performance depends on several factors:
Model architecture
Model size
Input resolution
Hardware
Execution provider
Preprocessing code
Therefore, you should benchmark the actual model instead of assuming that every ONNX model will automatically run in real time.
4. Dlib: A Traditional Option for Facial Landmarks
Dlib has been widely used in traditional face detection and facial landmark projects.
It can still be useful for certain applications.
However, installation and performance requirements may differ depending on your operating system and Python environment.
For a new beginner-focused face-filter project, you may find other solutions easier to start with.
Still, Dlib remains worth understanding because many older computer vision tutorials and projects use it.
5. PyTorch and Other Training Frameworks
If your goal is only to run an existing model, you may not need a full training framework in your final application.
However, if you want to train or fine-tune your own computer vision model, frameworks such as PyTorch can become important.
A possible workflow could be:
Prepare Dataset → Train Model → Evaluate Model → Export Compatible Model → Run With ONNX Runtime
This separates model development from deployment.
For beginners, though, I recommend starting with existing models and libraries.
Get the webcam pipeline working first.
Then add more advanced AI features gradually.
Choosing a Model for Real-Time Webcam Processing
The right model depends on what your application needs to detect.
There is no single “best” model for every webcam project.
Face Landmark Models
If your goal is to attach effects to facial features, use a solution that provides reliable face landmarks.
This gives you reference points for the eyes, mouth, nose, and face shape.
For our glasses and mustache effects, this is usually more useful than general object detection.
Lightweight Face Detection Models
If you only need to know where faces appear, a lightweight face detector may be enough.
This can be useful for:
Face counting
Face cropping
Privacy blur
Simple bounding boxes
However, a face detector alone may not give you enough information to position a mustache accurately.
For that, facial landmarks provide more detail.
YOLO-Style Object Detection Models
YOLO-family models are popular for real-time object detection.
Depending on the model, training, license, and export support, you may be able to use a YOLO-based detector for tasks such as detecting:
People
Vehicles
Animals
Common objects
Custom-trained classes
However, you should not automatically use a large object-detection model for simple face accessories.
It may add unnecessary complexity.
Use object detection when your project actually needs object detection.
Segmentation Models
Segmentation models identify regions of an image at the pixel level.
This can be useful for:
Background removal
Person segmentation
Object masks
Background replacement
However, segmentation can require more processing than simple detection.
For a real-time webcam application, model speed becomes important.
A large segmentation model may produce impressive results but fail to maintain a smooth frame rate on a typical CPU.
Therefore, always test your chosen model on the hardware you expect users to have.
Recommended Technology Stack
For the project in this tutorial, a practical starting stack is:
OpenCV for webcam capture and image processing.
Flask for the browser interface and video stream.
MediaPipe or another suitable landmark solution for tracking facial features.
ONNX Runtime when you need to run a specific compatible ONNX model.
This combination gives you room to start simple and add more advanced features later.
Beginner Setup
If you are completely new to computer vision, start with:
Flask + OpenCV
First, learn how to capture the webcam.
Then stream it to the browser.
After that, add simple filters.
Intermediate Setup
Once the basic stream works, add:
Flask + OpenCV + Face Landmarks
Now you can create face-based effects.
For example, you can add glasses, a mustache, or other transparent PNG overlays.
Advanced Setup
When you need additional AI features, consider:
Flask + OpenCV + Face Landmarks + ONNX Runtime
At this stage, ONNX Runtime can handle a separate compatible model for a specific AI task.
The key is to add complexity only when you need it.
A smaller, focused project is easier to debug and often performs better.
Part 2: Setting Up the Python Webcam Project
Now that we understand the technology, we can start building the application.
A simple project structure could look like this:
webcam-filter-app/
│
├── app.py
├── requirements.txt
│
└── static/
    ├── beard.png
    ├── mustache.png
    └── glasses.png
The app.py file contains the main Python application.
The requirements.txt file lists the Python packages.
Finally, the static folder contains the transparent PNG images that we will place over the user’s face.
Create requirements.txt
For the basic version shown here, your dependency file may look similar to this:
flask
opencv-python
numpy
mediapipe
If your application also runs an ONNX model, you can add the appropriate ONNX Runtime package required by your environment.
Keep in mind that package compatibility can change over time.
Therefore, for a real project, you should test specific package versions together and pin versions once you have a stable setup.
Prepare Your PNG Overlays
Before running the face effects, you need transparent PNG images.
For example:
static/beard.png
static/mustache.png
static/glasses.png
Transparency is important.
If your glasses image has a solid white background, the application may place a white rectangle over the user’s face.
Instead, use a PNG with an alpha channel.
The visible accessory should sit on a transparent canvas.
You should also crop unnecessary empty space around the design.
For example, if your glasses occupy only a small part of a huge transparent image, positioning and scaling can become more difficult.
Keep each overlay centered and properly cropped.
Part 3: Understanding the Core Flask and OpenCV Code
The application begins by importing the required libraries.
from flask import Flask, Response
import cv2
import numpy as np
import mediapipe as mp
Next, create the Flask application:
app = Flask(__name__)
Then connect to the webcam:
camera = cv2.VideoCapture(0)
This tells OpenCV to try opening the default camera.
However, you should add error handling in a real application.
For example, the camera may already be in use, the device index may be wrong, or the operating system may deny camera access.
Initialize Face Tracking
Next, initialize your facial landmark solution.
The exact API can vary depending on the MediaPipe package and version you use.
Therefore, always check the documentation for your installed version.
Conceptually, the process is:
Initialize face landmark detector
↓
Capture webcam frame
↓
Convert frame to required color format
↓
Process frame
↓
Read facial landmarks
OpenCV normally represents images in BGR order.
Many computer vision solutions expect RGB.
Therefore, you may need a conversion such as:
rgb = cv2.cvtColor(frame, cv2.COLOR_BGR2RGB)
After processing, the landmark system provides coordinates that your code can convert into pixel positions.
Converting Landmarks to Pixel Coordinates
Many landmark systems return normalized coordinates.
For example, an x value may range from 0 to 1 instead of using the actual image width.
To convert the value into a pixel coordinate, multiply it by the image width.
Similarly, multiply the normalized y coordinate by the image height.
Conceptually:
pixel_x = int(landmark.x * image_width)
pixel_y = int(landmark.y * image_height)
Now you have a position that you can use with OpenCV.
This is the foundation for placing face effects.
How Transparent PNG Overlays Work
A transparent PNG normally contains four channels:
Blue
Green
Red
Alpha
The alpha channel controls transparency.
When alpha is high, the overlay pixel appears more visible.
When alpha is low, more of the original webcam frame remains visible.
To combine the two images, your code blends the overlay with the webcam frame.
Conceptually:
Final Pixel =
Overlay Pixel × Alpha
+
Background Pixel × (1 - Alpha)
This creates smooth transparency.
Without alpha blending, your accessory may appear as a solid rectangle.
Prevent Overlay Boundary Errors
One important problem with simple overlay functions is image boundaries.
Imagine that the user moves close to the left side of the webcam frame.
Your calculated glasses position might become negative.
For example:
x = -20
If your code blindly tries to place the overlay from x = -20, array slicing may fail or produce incorrect results.
Therefore, a production-ready overlay function should clip the overlay to the valid frame area.
You should handle:
Negative x positions
Negative y positions
Overlays wider than the frame
Overlays taller than the frame
Missing PNG files
Invalid image dimensions
These checks make the application much more reliable.
Positioning Glasses With Eye Landmarks
To position glasses, identify useful landmarks around the left and right eye.
Next, calculate the distance between them.
That distance can help determine the width of the glasses.
Conceptually:
Glasses width = Distance between eye reference points × Scale factor
The center point between the eyes can determine the overlay position.
This approach works better than simply starting the glasses at the left-eye coordinate.
Why?
Because the PNG itself may extend beyond both eye landmarks.
If you use only the left eye as the starting x position, the glasses may appear too narrow or shifted to one side.
Instead, calculate the center and place the overlay around it.
Adding Rotation for More Natural Face Effects
A simple overlay may work when the user’s head remains perfectly straight.
However, people naturally tilt their heads.
If the head rotates but the glasses remain horizontal, the effect immediately looks unrealistic.
To improve this, calculate the angle between the eye landmarks.
Conceptually:
angle = atan2(
    right_eye_y - left_eye_y,
    right_eye_x - left_eye_x
)
You can then rotate the glasses overlay before blending it with the frame.
This small improvement can make a significant difference.
The same idea can help with other effects.
However, beard overlays are more complex because they may need to follow the jaw shape rather than simply rotate as a flat rectangle.
Positioning a Mustache
For a mustache, use landmarks near the upper lip and nose.
The basic goal is to calculate:
Horizontal center
Width
Vertical position
Rotation
Mouth landmarks can help estimate the width.
Meanwhile, the nose and upper-lip positions can help determine where the mustache should sit vertically.
Again, avoid relying on fixed values such as:
my = nose_y + 10
A fixed 10-pixel offset may look acceptable at one resolution but fail at another.
Instead, calculate offsets as a percentage of the detected face size.
For example:
vertical offset = face height × 0.03
Relative measurements usually work better when users move closer to or farther from the camera.
Positioning a Beard
A beard is more difficult than glasses or a mustache.
The lower face can change shape depending on:
Head angle
Face shape
Mouth movement
Camera perspective
A simple rectangular beard PNG may work for a fun prototype.
However, a more realistic implementation may need several jawline landmarks.
You can use those landmarks to estimate the width and height of the lower face.
For advanced effects, you may need to warp the beard image instead of simply resizing it.
Still, basic resizing and positioning provide a useful starting point.
Making Face Effects Smoother
One common problem with real-time face effects is jitter.
Even when the user’s face stays relatively still, detected landmark positions may change slightly between frames.
As a result, glasses or a mustache may appear to shake.
One solution is smoothing.
Instead of immediately using the newest coordinate, combine it with previous values.
Conceptually:
smoothed_position =
previous_position × 0.8
+
new_position × 0.2
This reduces sudden movement.
However, too much smoothing creates lag.
Therefore, you need to find a balance between stability and responsiveness.
Adding Real-Time OpenCV Filters
Face effects are only one part of the project.
You can also add basic OpenCV filters.
Grayscale Filter
A grayscale effect removes color information.
Conceptually:
gray = cv2.cvtColor(frame, cv2.COLOR_BGR2GRAY)
If you need to continue working with three-channel images, you may convert the result back to BGR.
Blur Filter
Blur can create a soft visual effect.
For example:
blurred = cv2.GaussianBlur(frame, (15, 15), 0)
You can adjust the kernel size to control the amount of blur.
Edge Detection
Canny edge detection can create a sketch-like view:
edges = cv2.Canny(frame, 100, 200)
These effects are useful because they help beginners understand frame-by-frame processing before adding machine learning.
Streaming Processed Frames Through Flask
After processing each frame, you need to send it to the browser.
OpenCV can encode the frame as JPEG:
success, buffer = cv2.imencode(".jpg", frame)
Next, convert the buffer into bytes:
frame_bytes = buffer.tobytes()
Your Flask generator can then yield each frame as part of a multipart response.
The browser receives the sequence and displays it as a continuous stream.
A Flask route can return the generator through a Response.
This creates a simple browser-based webcam viewer.
However, remember that MJPEG-style streaming sends individual compressed frames.
Therefore, it may use more bandwidth than modern video codecs.
For local experiments and educational projects, though, it remains a simple and practical option.
Where ONNX Runtime Fits Into the Project
Once your basic webcam app works, you can add an ONNX model.
However, first decide what problem the model needs to solve.
For example, you could add an ONNX model for:
Object detection
Face detection
Image classification
Segmentation
The workflow would look like this:
Capture Frame
↓
Prepare Image for Model
↓
Create ONNX Input Tensor
↓
Run Inference
↓
Read Predictions
↓
Draw or Apply Results
↓
Stream Frame
The preprocessing step must match the model.
For example, one model may expect:
640 × 640 RGB
Another may expect:
320 × 320 RGB
Some models expect normalized values.
Others may use different channel layouts.
Therefore, never assume that all ONNX models use the same preprocessing code.
Check the model documentation carefully.
Performance Tips for Real-Time Webcam Apps
Real-time video processing can use significant CPU resources.
Fortunately, several techniques can improve performance.
Process a Smaller Frame
Instead of running AI on a full 1920 × 1080 frame, create a smaller copy for detection.
Then map the results back to the larger frame.
This can significantly reduce processing time.
Skip Some AI Frames
You may not need to run a heavy AI model on every frame.
For example, you could run detection every second or third frame and track the result between detections.
Whether this works depends on your application.
Keep Models Loaded
Do not reload your AI model for every frame.
Load the model once when the application starts.
Then reuse the same inference session.
This avoids unnecessary overhead.
Measure Before Optimizing
Do not guess where your application is slow.
Measure it.
Track:
Capture time
Preprocessing time
AI inference time
Overlay processing time
JPEG encoding time
Once you know which step is slow, you can focus your optimization efforts there.
Privacy and Security Considerations
A webcam application handles sensitive data.
Therefore, privacy should be part of the design from the beginning.
In the Flask architecture described here, Python captures the webcam connected to the machine running the Flask application.
This is important.
If you deploy the Flask application on a remote server, cv2.VideoCapture(0) normally refers to a camera available to that server environment, not automatically to the website visitor’s webcam.
To access a visitor’s webcam in a normal web application, you generally need browser-side camera APIs and an appropriate method for sending or processing that video.
Therefore, this Flask and OpenCV example is best understood as a local application or prototype unless you redesign the camera capture architecture.
This distinction is important when turning a tutorial project into a public web service.
Common Problems You May Encounter
Webcam Does Not Open
Check whether another application is already using the camera.
You can also try another camera index.
Make sure your operating system allows camera access.
PNG Overlay Does Not Appear
Check the file path.
Make sure OpenCV successfully loads the image.
Also confirm that the PNG includes an alpha channel.
Overlay Looks Too Large or Small
Avoid fixed pixel sizes.
Instead, calculate the overlay size based on facial landmark distances.
Filter Shakes
Add smoothing to the landmark coordinates.
You can also improve your rotation and scaling calculations.
App Runs Slowly
Reduce the frame resolution.
Run heavy models less frequently.
Measure inference time.
Consider using a lighter model.
Ideas for Expanding the Project
Once the basic application works, you can add more features.
For example:
User-selectable filters
On/off buttons for glasses
Different beard styles
Multiple mustache options
Hats and masks
Background blur
Background replacement
Object detection
Face privacy blur
Screenshot capture
Video recording
You could also create a cleaner frontend with JavaScript and CSS.
For more advanced browser applications, you might move webcam capture to the browser and use a different streaming or inference architecture.
The right approach depends on whether your project is a local Python experiment, an internal application, or a public web product.
Final Thoughts: Build Your Real-Time Webcam App Step by Step
Building a real-time webcam app with Python, Flask, OpenCV, MediaPipe, and ONNX Runtime may sound complicated at first.
However, the project becomes much easier when you divide it into smaller parts.
Start with the webcam.
Make sure OpenCV can capture frames correctly.
Next, connect the video pipeline to Flask and display the stream in your browser.
Once that works, experiment with simple OpenCV effects such as grayscale, blur, and edge detection.
After that, add facial landmarks.
Use the landmarks to position glasses, mustaches, beards, or other transparent PNG effects.
Focus on getting the position and scale correct before adding more advanced features such as rotation and smoothing.
Finally, consider ONNX Runtime when you have a specific AI model that adds real value to your application.
You do not need every technology on day one.
A simple application that works reliably is better than an advanced project filled with unnecessary models and dependencies.
As your skills improve, you can expand the project with object detection, segmentation, background effects, custom-trained models, or more advanced browser-based video technology.
Most importantly, understand what each tool contributes.
OpenCV handles video and image processing. Flask provides a simple way to expose the processed stream through a web application. Facial landmarks help you track features of the face. ONNX Runtime gives you a way to run compatible machine learning models when your project needs them.
Together, these technologies provide a strong foundation for experimenting with real-time computer vision.
Start small, test each part separately, and improve the application one feature at a time.
That approach will not only help you build a better webcam filter app. It will also teach you practical skills that you can reuse in many other Python, computer vision, and AI projects.
Below is a complete starter project with all the main files. It uses Flask + OpenCV + MediaPipe for a local webcam app, with selectable filters and transparent PNG overlays. ONNX Runtime is included as an optional extension point rather than pretending a specific model will work without its own preprocessing code.
Project structure
					webcam-filter-app/
├── app.py
├── requirements.txt
├── templates/
│   └── index.html
└── static/
    ├── css/
    │   └── style.css
    ├── js/
    │   └── app.js
    └── overlays/
        ├── glasses.png
        ├── mustache.png
        └── beard.png
1. requirements.txt
					Flask
opencv-python
numpy
mediapipe
onnxruntime
2. app.py
					from flask import Flask, Response, render_template, request, jsonify
import cv2
import numpy as np
import os
import threading

try:
    import mediapipe as mp
except ImportError:
    mp = None

app = Flask(__name__)

# ---------------------------------------------------------
# Global application state
# ---------------------------------------------------------

camera = cv2.VideoCapture(0)
camera_lock = threading.Lock()

current_filter = "normal"
active_overlays = {
    "glasses": False,
    "mustache": False,
    "beard": False,
}

# ---------------------------------------------------------
# Load transparent PNG overlays
# ---------------------------------------------------------

BASE_DIR = os.path.dirname(os.path.abspath(__file__))

OVERLAY_DIR = os.path.join(BASE_DIR, "static", "overlays")


def load_overlay(filename):
    path = os.path.join(OVERLAY_DIR, filename)

    if not os.path.exists(path):
        print(f"Warning: Overlay not found: {path}")
        return None

    image = cv2.imread(path, cv2.IMREAD_UNCHANGED)

    if image is None:
        print(f"Warning: Could not load: {path}")
        return None

    if image.shape[2] != 4:
        print(f"Warning: {filename} does not contain an alpha channel.")
        return None

    return image


glasses_img = load_overlay("glasses.png")
mustache_img = load_overlay("mustache.png")
beard_img = load_overlay("beard.png")


# ---------------------------------------------------------
# MediaPipe setup
# ---------------------------------------------------------

face_mesh = None

if mp is not None:
    try:
        mp_face_mesh = mp.solutions.face_mesh

        face_mesh = mp_face_mesh.FaceMesh(
            static_image_mode=False,
            max_num_faces=1,
            refine_landmarks=True,
            min_detection_confidence=0.5,
            min_tracking_confidence=0.5,
        )

    except Exception as error:
        print("Could not initialize MediaPipe Face Mesh:", error)


# ---------------------------------------------------------
# Helper: Get landmark pixel position
# ---------------------------------------------------------

def get_landmark(landmarks, index, width, height):
    landmark = landmarks[index]

    x = int(landmark.x * width)
    y = int(landmark.y * height)

    return np.array([x, y])


# ---------------------------------------------------------
# Helper: Alpha blend transparent PNG
# ---------------------------------------------------------

def overlay_transparent(background, overlay, x, y, width=None, height=None):

    if overlay is None:
        return background

    if width is not None and height is not None:

        if width <= 0 or height <= 0:
            return background

        overlay = cv2.resize(
            overlay,
            (int(width), int(height)),
            interpolation=cv2.INTER_AREA
        )

    overlay_h, overlay_w = overlay.shape[:2]
    background_h, background_w = background.shape[:2]

    # Calculate visible area
    x1 = max(x, 0)
    y1 = max(y, 0)

    x2 = min(x + overlay_w, background_w)
    y2 = min(y + overlay_h, background_h)

    if x1 >= x2 or y1 >= y2:
        return background

    # Calculate matching crop from overlay
    overlay_x1 = x1 - x
    overlay_y1 = y1 - y

    overlay_x2 = overlay_x1 + (x2 - x1)
    overlay_y2 = overlay_y1 + (y2 - y1)

    overlay_crop = overlay[
        overlay_y1:overlay_y2,
        overlay_x1:overlay_x2
    ]

    if overlay_crop.size == 0:
        return background

    rgb = overlay_crop[:, :, :3].astype(float)

    alpha = (
        overlay_crop[:, :, 3]
        .astype(float) / 255.0
    )

    alpha = np.expand_dims(alpha, axis=2)

    roi = background[y1:y2, x1:x2].astype(float)

    blended = (
        alpha * rgb
        + (1.0 - alpha) * roi
    )

    background[y1:y2, x1:x2] = blended.astype(np.uint8)

    return background


# ---------------------------------------------------------
# OpenCV filters
# ---------------------------------------------------------

def apply_filter(frame, filter_name):

    if filter_name == "grayscale":

        gray = cv2.cvtColor(
            frame,
            cv2.COLOR_BGR2GRAY
        )

        return cv2.cvtColor(
            gray,
            cv2.COLOR_GRAY2BGR
        )

    elif filter_name == "blur":

        return cv2.GaussianBlur(
            frame,
            (15, 15),
            0
        )

    elif filter_name == "edges":

        gray = cv2.cvtColor(
            frame,
            cv2.COLOR_BGR2GRAY
        )

        edges = cv2.Canny(
            gray,
            100,
            200
        )

        return cv2.cvtColor(
            edges,
            cv2.COLOR_GRAY2BGR
        )

    elif filter_name == "warm":

        result = frame.astype(np.int16)

        result[:, :, 2] += 25
        result[:, :, 0] -= 10

        return np.clip(
            result,
            0,
            255
        ).astype(np.uint8)

    return frame


# ---------------------------------------------------------
# Add face overlays
# ---------------------------------------------------------

def apply_face_overlays(frame):

    if face_mesh is None:
        return frame

    rgb_frame = cv2.cvtColor(
        frame,
        cv2.COLOR_BGR2RGB
    )

    results = face_mesh.process(rgb_frame)

    if not results.multi_face_landmarks:
        return frame

    height, width = frame.shape[:2]

    for face in results.multi_face_landmarks:

        landmarks = face.landmark

        # Useful MediaPipe landmark indices
        left_eye = get_landmark(
            landmarks,
            33,
            width,
            height
        )

        right_eye = get_landmark(
            landmarks,
            263,
            width,
            height
        )

        nose = get_landmark(
            landmarks,
            1,
            width,
            height
        )

        upper_lip = get_landmark(
            landmarks,
            13,
            width,
            height
        )

        mouth_left = get_landmark(
            landmarks,
            61,
            width,
            height
        )

        mouth_right = get_landmark(
            landmarks,
            291,
            width,
            height
        )

        chin = get_landmark(
            landmarks,
            152,
            width,
            height
        )

        jaw_left = get_landmark(
            landmarks,
            234,
            width,
            height
        )

        jaw_right = get_landmark(
            landmarks,
            454,
            width,
            height
        )

        # -------------------------------------------------
        # Glasses
        # -------------------------------------------------

        if active_overlays["glasses"] and glasses_img is not None:

            eye_distance = np.linalg.norm(
                right_eye - left_eye
            )

            glasses_width = int(
                eye_distance * 1.65
            )

            aspect_ratio = (
                glasses_img.shape[0]
                / glasses_img.shape[1]
            )

            glasses_height = int(
                glasses_width * aspect_ratio
            )

            eye_center = (
                left_eye + right_eye
            ) // 2

            x = int(
                eye_center[0]
                - glasses_width / 2
            )

            y = int(
                eye_center[1]
                - glasses_height / 2
            )

            frame = overlay_transparent(
                frame,
                glasses_img,
                x,
                y,
                glasses_width,
                glasses_height
            )

        # -------------------------------------------------
        # Mustache
        # -------------------------------------------------

        if active_overlays["mustache"] and mustache_img is not None:

            mouth_width = np.linalg.norm(
                mouth_right - mouth_left
            )

            mustache_width = int(
                mouth_width * 1.35
            )

            aspect_ratio = (
                mustache_img.shape[0]
                / mustache_img.shape[1]
            )

            mustache_height = int(
                mustache_width * aspect_ratio
            )

            mustache_center = (
                nose + upper_lip
            ) // 2

            x = int(
                mustache_center[0]
                - mustache_width / 2
            )

            y = int(
                mustache_center[1]
                - mustache_height / 2
            )

            frame = overlay_transparent(
                frame,
                mustache_img,
                x,
                y,
                mustache_width,
                mustache_height
            )

        # -------------------------------------------------
        # Beard
        # -------------------------------------------------

        if active_overlays["beard"] and beard_img is not None:

            jaw_width = np.linalg.norm(
                jaw_right - jaw_left
            )

            beard_width = int(
                jaw_width * 1.05
            )

            aspect_ratio = (
                beard_img.shape[0]
                / beard_img.shape[1]
            )

            beard_height = int(
                beard_width * aspect_ratio
            )

            beard_center_x = int(
                (
                    jaw_left[0]
                    + jaw_right[0]
                ) / 2
            )

            x = int(
                beard_center_x
                - beard_width / 2
            )

            y = int(
                upper_lip[1]
            )

            # Prevent extremely large beard
            max_height = int(
                abs(
                    chin[1]
                    - upper_lip[1]
                ) * 2.0
            )

            if max_height > 0:

                beard_height = min(
                    beard_height,
                    max_height
                )

            frame = overlay_transparent(
                frame,
                beard_img,
                x,
                y,
                beard_width,
                beard_height
            )

    return frame


# ---------------------------------------------------------
# Video frame generator
# ---------------------------------------------------------

def generate_frames():

    global current_filter

    while True:

        with camera_lock:

            success, frame = camera.read()

        if not success:
            break

        # Mirror webcam
        frame = cv2.flip(
            frame,
            1
        )

        # Resize for more consistent performance
        frame = cv2.resize(
            frame,
            (640, 480)
        )

        # Add face overlays first
        frame = apply_face_overlays(
            frame
        )

        # Apply selected visual filter
        frame = apply_filter(
            frame,
            current_filter
        )

        # Encode as JPEG
        success, buffer = cv2.imencode(
            ".jpg",
            frame,
            [
                int(cv2.IMWRITE_JPEG_QUALITY),
                80
            ]
        )

        if not success:
            continue

        frame_bytes = buffer.tobytes()

        yield (
            b"--frame\r\n"
            b"Content-Type: image/jpeg\r\n\r\n"
            + frame_bytes
            + b"\r\n"
        )


# ---------------------------------------------------------
# Flask routes
# ---------------------------------------------------------

@app.route("/")
def index():

    return render_template(
        "index.html"
    )


@app.route("/video_feed")
def video_feed():

    return Response(
        generate_frames(),
        mimetype=(
            "multipart/x-mixed-replace;"
            " boundary=frame"
        )
    )


@app.route("/set_filter", methods=["POST"])
def set_filter():

    global current_filter

    data = request.get_json()

    selected_filter = data.get(
        "filter",
        "normal"
    )

    allowed_filters = [
        "normal",
        "grayscale",
        "blur",
        "edges",
        "warm"
    ]

    if selected_filter in allowed_filters:

        current_filter = selected_filter

    return jsonify({
        "success": True,
        "filter": current_filter
    })


@app.route("/toggle_overlay", methods=["POST"])
def toggle_overlay():

    data = request.get_json()

    overlay_name = data.get(
        "overlay"
    )

    enabled = data.get(
        "enabled",
        False
    )

    if overlay_name in active_overlays:

        active_overlays[
            overlay_name
        ] = bool(enabled)

    return jsonify({
        "success": True,
        "overlays": active_overlays
    })


# ---------------------------------------------------------
# Start Flask
# ---------------------------------------------------------

if __name__ == "__main__":

    if not camera.isOpened():

        print(
            "Error: Could not open webcam."
        )

    app.run(
        host="127.0.0.1",
        port=5000,
        debug=True,
        threaded=True,
        use_reloader=False
    )
3. templates/index.html
					<!DOCTYPE html>
<html lang="en">

<head>

    <meta charset="UTF-8">

    <meta
        name="viewport"
        content="width=device-width, initial-scale=1.0"
    >

    <title>
        Python Webcam Filter App
    </title>

    <link
        rel="stylesheet"
        href="{{ url_for('static', filename='css/style.css') }}"
    >

</head>

<body>

    <main class="app-container">

        <header>

            <h1>
                Real-Time Webcam Filter App
            </h1>

            <p>
                Built with Python, Flask,
                OpenCV and MediaPipe
            </p>

        </header>


        <section class="camera-section">

            <div class="video-wrapper">

                <img decoding="async"
                    id="videoFeed"
                    src="{{ url_for('video_feed') }}"
                    alt="Live webcam stream"
                >

            </div>

        </section>


        <section class="controls">

            <div class="control-group">

                <h2>
                    Camera Filters
                </h2>

                <div class="button-group">

                    <button
                        class="filter-button active"
                        data-filter="normal"
                    >
                        Normal
                    </button>

                    <button
                        class="filter-button"
                        data-filter="grayscale"
                    >
                        Grayscale
                    </button>

                    <button
                        class="filter-button"
                        data-filter="blur"
                    >
                        Blur
                    </button>

                    <button
                        class="filter-button"
                        data-filter="edges"
                    >
                        Edges
                    </button>

                    <button
                        class="filter-button"
                        data-filter="warm"
                    >
                        Warm
                    </button>

                </div>

            </div>


            <div class="control-group">

                <h2>
                    Face Effects
                </h2>

                <div class="toggle-list">

                    <label>

                        <input
                            type="checkbox"
                            class="overlay-toggle"
                            data-overlay="glasses"
                        >

                        Glasses

                    </label>


                    <label>

                        <input
                            type="checkbox"
                            class="overlay-toggle"
                            data-overlay="mustache"
                        >

                        Mustache

                    </label>


                    <label>

                        <input
                            type="checkbox"
                            class="overlay-toggle"
                            data-overlay="beard"
                        >

                        Beard

                    </label>

                </div>

            </div>

        </section>


        <div
            id="status"
            class="status"
        >
            Camera ready
        </div>

    </main>


    <script
        src="{{ url_for('static', filename='js/app.js') }}"
    ></script>

</body>

</html>
4. static/css/style.css
					* {
    box-sizing: border-box;
}

body {
    margin: 0;
    min-height: 100vh;
    font-family:
        Arial,
        Helvetica,
        sans-serif;
    background: #f4f6f8;
    color: #1f2937;
}

.app-container {
    width: min(1000px, 94%);
    margin: 0 auto;
    padding: 40px 0;
}

header {
    text-align: center;
    margin-bottom: 30px;
}

header h1 {
    margin-bottom: 10px;
    font-size: 2.2rem;
}

header p {
    margin: 0;
    color: #6b7280;
}

.camera-section {
    display: flex;
    justify-content: center;
}

.video-wrapper {
    width: 100%;
    max-width: 720px;
    padding: 10px;
    background: #111827;
    border-radius: 18px;
    box-shadow:
        0 15px 40px
        rgba(0, 0, 0, 0.15);
}

.video-wrapper img {
    display: block;
    width: 100%;
    height: auto;
    border-radius: 10px;
}

.controls {
    display: grid;
    grid-template-columns:
        repeat(
            auto-fit,
            minmax(280px, 1fr)
        );
    gap: 20px;
    margin-top: 30px;
}

.control-group {
    padding: 24px;
    background: white;
    border-radius: 16px;
    box-shadow:
        0 8px 25px
        rgba(0, 0, 0, 0.06);
}

.control-group h2 {
    margin-top: 0;
    font-size: 1.2rem;
}

.button-group {
    display: flex;
    flex-wrap: wrap;
    gap: 10px;
}

button {
    padding: 11px 18px;
    border: 0;
    border-radius: 8px;
    background: #e5e7eb;
    color: #111827;
    font-size: 0.95rem;
    cursor: pointer;
    transition:
        transform 0.2s ease,
        opacity 0.2s ease;
}

button:hover {
    transform: translateY(-2px);
}

button.active {
    background: #111827;
    color: white;
}

.toggle-list {
    display: flex;
    flex-direction: column;
    gap: 15px;
}

.toggle-list label {
    display: flex;
    align-items: center;
    gap: 10px;
    cursor: pointer;
}

.toggle-list input {
    width: 18px;
    height: 18px;
}

.status {
    margin-top: 25px;
    text-align: center;
    color: #6b7280;
}

@media (max-width: 600px) {

    .app-container {
        padding-top: 20px;
    }

    header h1 {
        font-size: 1.6rem;
    }

    .control-group {
        padding: 18px;
    }

}
5. static/js/app.js
					const filterButtons =
    document.querySelectorAll(
        ".filter-button"
    );

const overlayToggles =
    document.querySelectorAll(
        ".overlay-toggle"
    );

const statusElement =
    document.getElementById(
        "status"
    );


function updateStatus(message) {

    statusElement.textContent =
        message;

}


filterButtons.forEach(
    (button) => {

        button.addEventListener(
            "click",
            async () => {

                const filter =
                    button.dataset.filter;

                updateStatus(
                    "Changing filter..."
                );

                try {

                    const response =
                        await fetch(
                            "/set_filter",
                            {
                                method: "POST",

                                headers: {
                                    "Content-Type":
                                        "application/json"
                                },

                                body:
                                    JSON.stringify({
                                        filter: filter
                                    })
                            }
                        );

                    const data =
                        await response.json();

                    if (data.success) {

                        filterButtons.forEach(
                            (item) => {

                                item.classList.remove(
                                    "active"
                                );

                            }
                        );

                        button.classList.add(
                            "active"
                        );

                        updateStatus(
                            `Filter: ${data.filter}`
                        );

                    }

                } catch (error) {

                    console.error(
                        error
                    );

                    updateStatus(
                        "Could not change filter."
                    );

                }

            }
        );

    }
);


overlayToggles.forEach(
    (toggle) => {

        toggle.addEventListener(
            "change",
            async () => {

                const overlay =
                    toggle.dataset.overlay;

                const enabled =
                    toggle.checked;

                updateStatus(
                    "Updating face effect..."
                );

                try {

                    const response =
                        await fetch(
                            "/toggle_overlay",
                            {
                                method: "POST",

                                headers: {
                                    "Content-Type":
                                        "application/json"
                                },

                                body:
                                    JSON.stringify({
                                        overlay:
                                            overlay,

                                        enabled:
                                            enabled
                                    })
                            }
                        );

                    const data =
                        await response.json();

                    if (data.success) {

                        updateStatus(
                            `${overlay} ${
                                enabled
                                    ? "enabled"
                                    : "disabled"
                            }`
                        );

                    }

                } catch (error) {

                    console.error(
                        error
                    );

                    updateStatus(
                        "Could not update effect."
                    );

                }

            }
        );

    }
);
You could load it once in app.py:
					from onnx_model import ONNXModel

model = ONNXModel(
    "models/model.onnx"
)
Do not run InferenceSession() inside the frame loop. Load the model once and reuse the session.
7. Run the project
Create the folders shown above, then add your transparent glasses.png, mustache.png, and beard.png files to:
static/overlays/Install the dependencies:
pip install -r requirements.txtRun the application:
python app.pyThen open this local address in your browser:
http://127.0.0.1:5000One important limitation: this code uses cv2.VideoCapture(0), so it captures the webcam attached to the computer running Python. If you deploy Flask to a remote web server, it will not automatically access each website visitor’s webcam. For a public web app, you would typically capture the visitor’s camera with browser APIs such as getUserMedia() and redesign the video-processing pipeline accordingly.
Frequently Asked Questions About Real-Time Webcam Streaming With Python
Learn how to stream a webcam feed from Python to a web browser, capture live video frames with OpenCV, serve them through a web application, and improve the performance and security of a real-time camera streaming project.
How can I stream a webcam to a browser using Python?
A common approach is to use Python with OpenCV to capture frames from a webcam and a Python web framework to send those frames to a browser.
The Python application continuously reads frames from the camera, encodes them into a browser-compatible image format, and serves the resulting stream through an HTTP endpoint. The browser then displays that endpoint as a continuously updating video feed.
What do I need for real-time webcam streaming in Python?
The exact requirements depend on your implementation, but a basic Python webcam streaming project commonly includes:
- A computer with a connected or built-in webcam
- Python installed on the system
- A library such as OpenCV for camera access
- A Python web framework for serving the application
- A modern web browser for displaying the stream
You may also need additional configuration when accessing the stream from another device or deploying the application outside your local development environment.
What is OpenCV used for in Python webcam streaming?
OpenCV is a computer vision library commonly used in Python projects for image and video processing. In a webcam streaming application, it can be used to connect to a camera and retrieve individual video frames.
Those frames can then be resized, modified, analyzed, encoded, or passed to another part of the application before being sent to the browser.
What does cv2.VideoCapture do?
cv2.VideoCapture is commonly used in OpenCV to
open a video source. That source can be a connected camera,
a video file, or another supported video input.
For a webcam project, an application can create a VideoCapture object and repeatedly request new frames from the camera. The correct camera index or video source may vary depending on the computer and connected devices.
Can Flask stream webcam video to a web browser?
Yes. Flask can be used to build a Python web application that serves webcam frames through an HTTP response. One approach is to create a generator that continuously yields encoded frames and connect it to a Flask route.
The browser can then request the streaming route and display the sequence of images as a live feed.
What is MJPEG webcam streaming?
MJPEG, or Motion JPEG, represents video as a sequence of individually compressed JPEG images. In a simple browser streaming setup, a Python application can continuously send JPEG frames as part of a multipart HTTP response.
This approach can be relatively straightforward to implement for demonstrations, prototypes, monitoring interfaces, and local-network projects. It is not necessarily the best choice for every large-scale or low-bandwidth streaming application.
How does a Python webcam feed appear in HTML?
In an MJPEG-style implementation, the HTML page can reference the application's video streaming endpoint as an image source. The server continuously supplies new frames, allowing the browser to display an updating camera feed.
This keeps the basic frontend relatively simple because much of the camera capture and frame processing happens in the Python application.
Is webcam streaming with Python truly real time?
A Python webcam stream can provide a near-real-time viewing experience, but some latency is normally present. The delay can be affected by camera capture speed, frame encoding, image resolution, network conditions, server performance, browser rendering, and the streaming method.
For applications that require extremely low latency, developers may need to evaluate technologies designed specifically for real-time media communication.
Why is my Python webcam stream slow or laggy?
Webcam streaming performance can be affected by several factors. High-resolution frames require more processing and bandwidth, while JPEG encoding can add CPU overhead.
Common causes of lag include:
- High camera resolution
- Large encoded frame sizes
- Limited CPU performance
- Slow network connections
- Processing every frame with expensive operations
- Multiple simultaneous viewers
- Inefficient frame capture or streaming logic
How can I improve Python webcam streaming performance?
One of the simplest optimizations is to reduce the resolution of frames before encoding and streaming them. You can also adjust compression settings, limit the effective frame rate, and avoid unnecessary processing.
More advanced applications may separate frame capture from client delivery so the camera is not reopened or processed independently for every connected viewer.
Can I process webcam frames before showing them in the browser?
Yes. One advantage of capturing webcam frames with OpenCV is that the application can process each frame before sending it to the browser.
Depending on your project, processing might include:
- Resizing or cropping frames
- Adding text or timestamps
- Applying image filters
- Drawing shapes or overlays
- Running object detection
- Performing motion analysis
- Applying other computer vision operations
Keep in mind that complex processing can increase CPU or GPU usage and add latency to the live stream.
Can I view a Python webcam stream from another device?
Potentially, yes. If the Python web server is configured to listen on an appropriate network interface, another device on the permitted network may be able to access the application using the host computer's network address and port.
Firewall rules, router configuration, operating system settings, and network security policies can affect connectivity. Avoid exposing an unsecured webcam feed directly to the public internet.
Can multiple users watch the same Python webcam stream?
It is possible to design an application where multiple clients view a camera feed, but the architecture becomes important as the number of viewers increases.
A simple development implementation may work for a small number of clients, while a production system may require more careful management of camera access, shared frames, concurrent connections, bandwidth, and server resources.
Why does my webcam fail to open in OpenCV?
A camera may fail to open for several reasons. The camera index might be incorrect, another application may already be using the webcam, camera permissions may be disabled, or the device may not be detected correctly by the operating system.
Check that the webcam works in another application, verify camera permissions, close other programs that may be accessing it, and confirm that your code is using the correct video source.
Can I use an external USB webcam with Python?
Yes, provided the operating system and OpenCV can access the camera. When multiple cameras are connected, you may need to identify the correct device index or use an appropriate video source configuration.
Camera behavior can vary across operating systems, drivers, hardware, and OpenCV backends, so testing the target setup is important.
Is a Python webcam streaming app secure?
Security depends on how the application is designed and deployed. A basic development server with an unprotected webcam endpoint should not automatically be considered safe for public internet access.
A production deployment may need appropriate authentication, authorization, encrypted connections, secure network configuration, access controls, and other protections based on the sensitivity of the camera feed.
Should I use Flask's development server for production webcam streaming?
A framework's built-in development server is generally intended for development and testing rather than a production deployment. A public-facing application should use an appropriate production architecture and be configured with security, reliability, and performance requirements in mind.
The best deployment approach depends on your operating system, hosting environment, streaming method, expected traffic, and application architecture.
What is the difference between MJPEG and WebRTC for webcam streaming?
MJPEG streaming can be relatively simple because it delivers a sequence of JPEG images to the browser. This can make it useful for straightforward camera viewing applications and prototypes.
WebRTC is designed for real-time media communication and can be more suitable for applications where low latency, audio, peer communication, and more advanced real-time streaming capabilities are required. WebRTC is also generally more complex to implement.
What projects can I build with Python webcam streaming?
A Python webcam-to-browser project can provide a foundation for many computer vision and monitoring applications, including:
- Local camera monitoring dashboards
- Computer vision demonstrations
- Object detection interfaces
- Motion detection projects
- QR code and barcode experiments
- Educational OpenCV projects
- Image processing demonstrations
- AI-powered camera prototypes
Projects involving surveillance or monitoring should always respect applicable privacy laws, consent requirements, and security best practices.
What is the basic workflow for streaming a webcam from Python to a browser?
The exact implementation can vary, but the overall workflow is usually straightforward:
- Connect Python to the webcam.
- Capture frames from the camera.
- Optionally process or resize each frame.
- Encode frames into a suitable format.
- Serve the frames through a web endpoint.
- Load the streaming endpoint in the browser.
- Optimize performance and secure access as needed.